Über 30.000 Videos werden jeden Monat mit Revid veröffentlicht
KI-Foto-zu-Video-Konverter
Verwandle deine Fotos mit KI in fesselnde Videos. Lade deine Bilder hoch und lass unseren Foto-zu-Video-Konverter fließende Übergänge erstellen, Musik hinzufügen und aus deiner Fotosammlung professionelle Videos generieren.
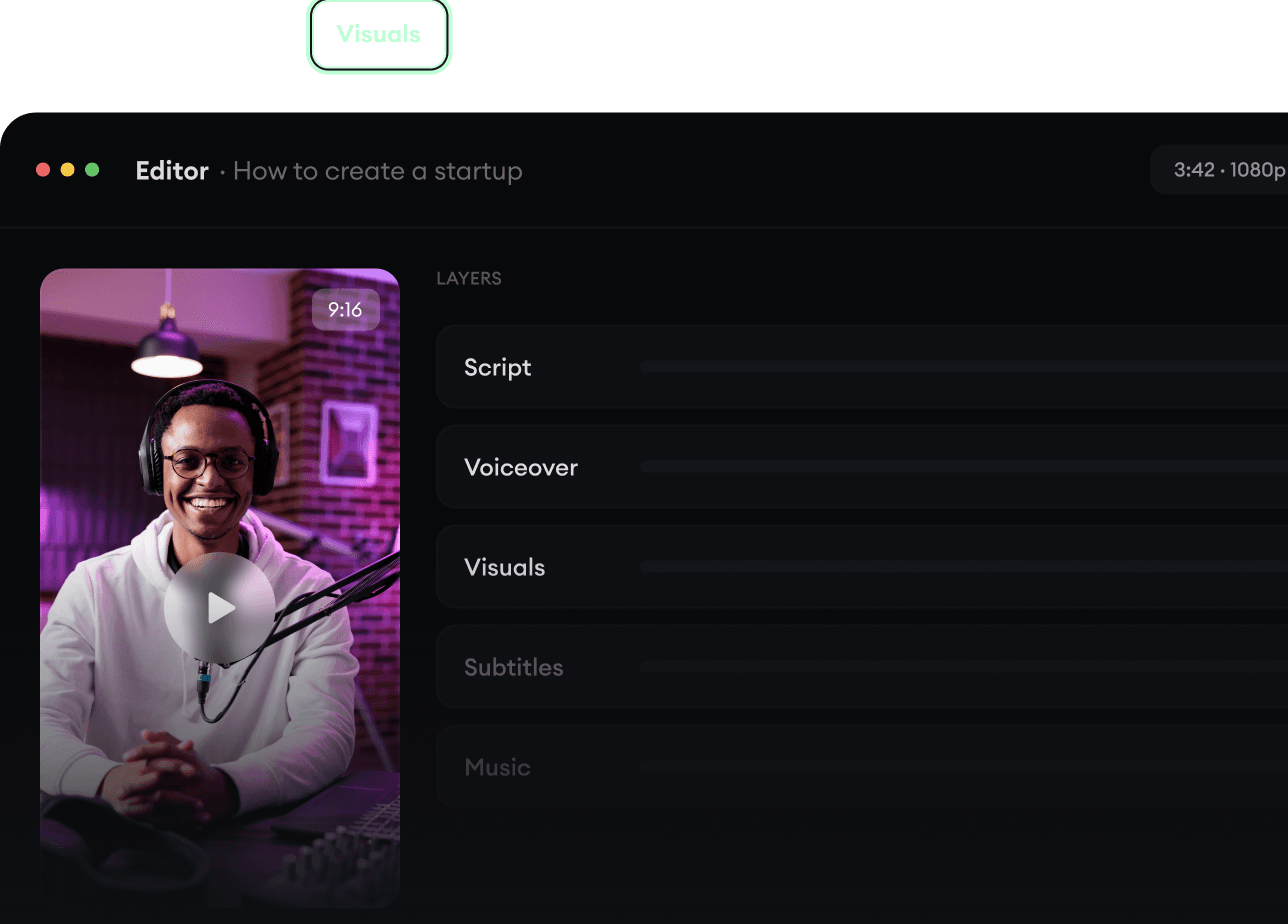
Dein Video-Prompt
💡 Beschreibe in eigenen Worten, was du im Video sehen möchtest. Die KI erstellt daraus ein Skript.
2,600 Videos in den letzten 24h mit Revid erstellt
In wenigen Minuten fertig · Alles vor dem Posten bearbeiten
Beispielergebnisse
Media: AI videoPreset: PhotographyRatio: 9:16Quality: UltraSeedance 1080p
Diese Tools könnten dir gefallen:
oder entdecke über 42 weitere Tools für genau das Video, das du willst
**Recommended preset: Ultra Realism**
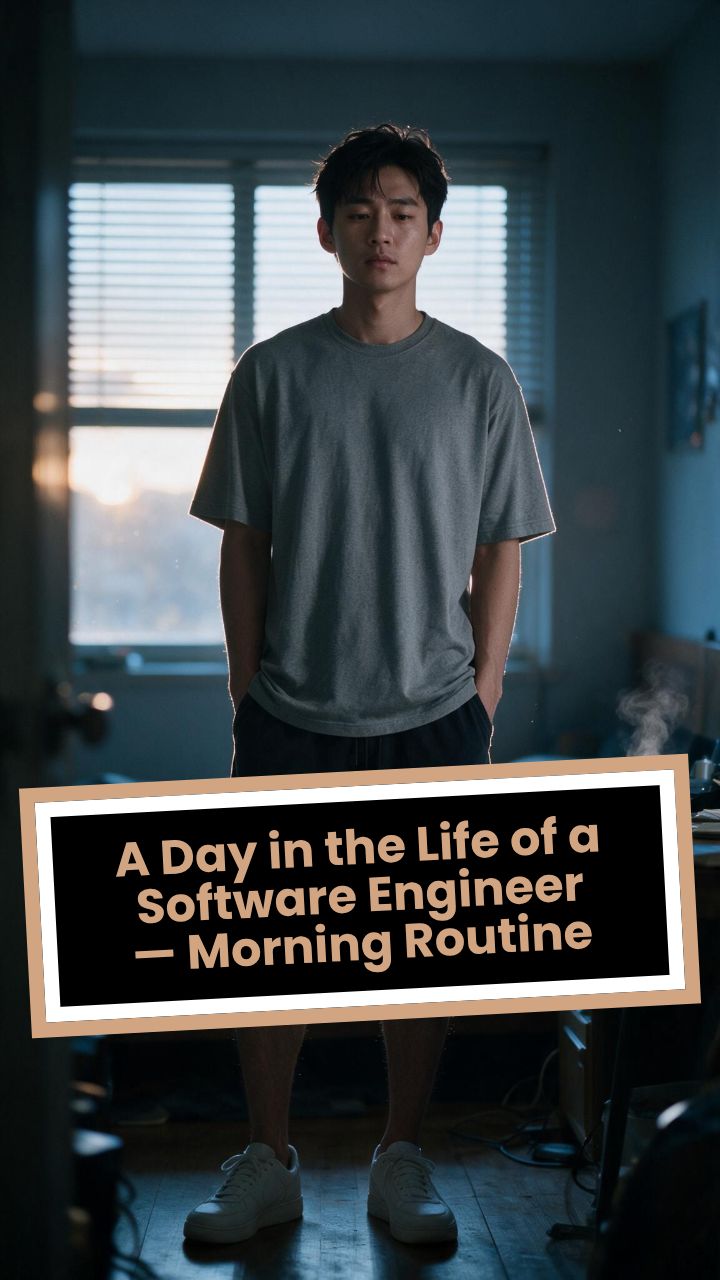
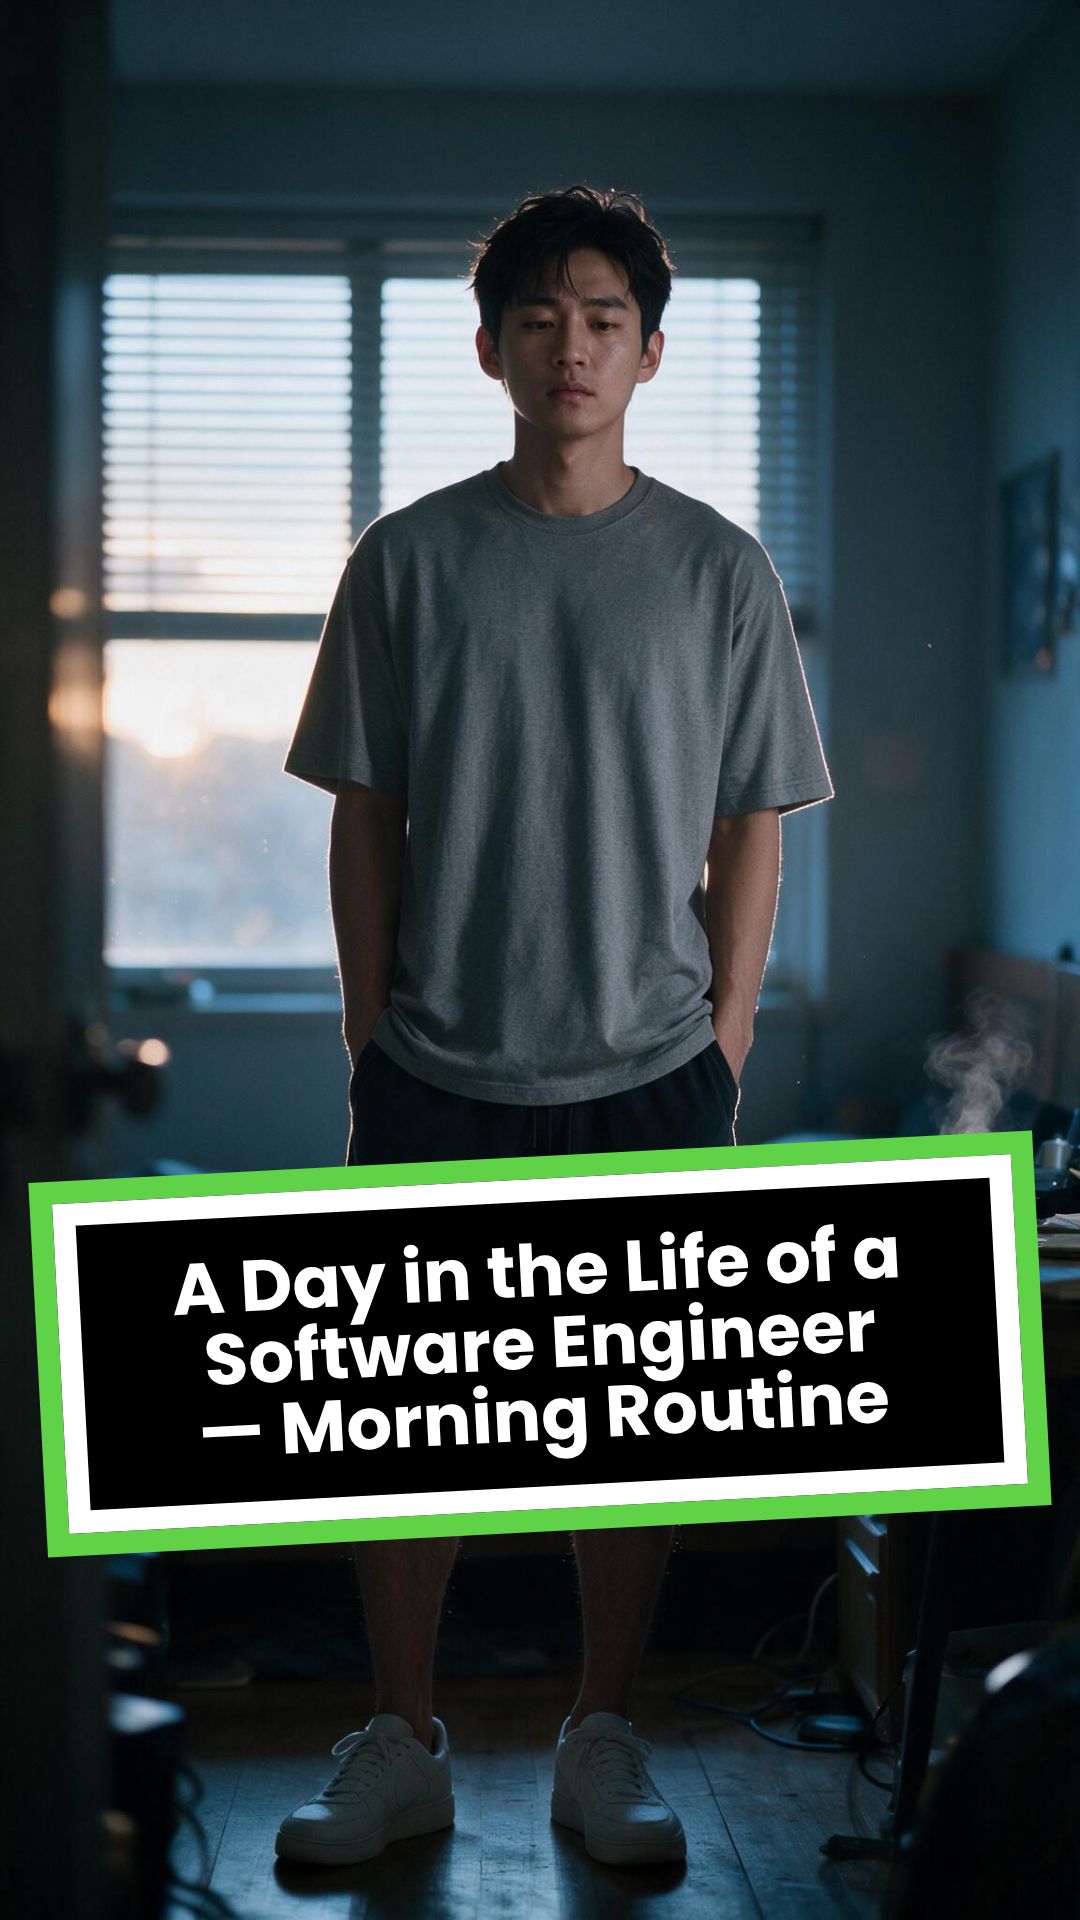
# A Day in the Life of a Software Engineer — Morning Routine
## STARTING FRAME
Extreme macro close-up of a smartphone resting face-up on a dark wooden bedside table in a quiet apartment bedroom before sunrise. The alarm reads **6:30 AM** in crisp white digits. The edge of the phone, tiny dust particles on the table, and the faint reflection of the screen are sharply detailed.
Several feet behind it, a young Asian man in his late twenties lies asleep beneath slightly rumpled bedding. He is only a soft, indistinct silhouette because of the extremely shallow depth of field. Cool blue-grey morning light leaks through partially closed curtains, creating faint horizontal shadows across the room.
A closed laptop, sleeping monitor, mechanical keyboard, notebook, headphones, water bottle, and hoodie resting over a desk chair are visible only as subdued background shapes.
The room is completely still.
Animate forward from this exact frame.
---
## [0s–3s] — THE ALARM
The camera remains extremely low, almost level with the bedside table.
For the first moment, nothing moves.
Then the alarm begins ringing.
The smartphone vibrates against the wooden surface in short mechanical pulses. One corner taps faintly against the table with each vibration. The glow from the screen reflects subtly across the wood grain.
Keep the sleeping man fully blurred in the background.
Do not reveal his face yet.
The curtains move almost imperceptibly from a weak draft. Distant traffic hums outside. A soft electrical ambience comes from the sleeping computer monitor.
Allow the alarm to interrupt the quiet rather than immediately triggering a reaction.
---
## [3s–6s] — THE FIRST REACTION
Begin a very slow rack focus away from the phone.
The alarm digits gradually soften.
The sleeping man’s shoulder, face, pillow, and blanket slowly resolve into focus.
He does not immediately wake.
His eyebrows contract slightly.
His head presses deeper into the pillow as though instinctively trying to escape the sound.
One hand shifts beneath the blanket.
His fingers curl faintly against the fabric.
The bedding moves only a few centimetres as his body reacts before his mind is fully awake.
The voice-over begins quietly:
> “Most days aren’t my best days.”
The delivery is close, restrained, personal, and slightly tired. It should sound like a private thought rather than narration for an audience.
---
## [6s–10s] — WAKING
His eyes open slowly.
They remain unfocused.
He blinks once.
A longer pause.
Then he blinks again.
His gaze drifts toward the sound without turning his head completely.
One hand emerges from beneath the blanket and reaches toward the bedside table. His arm moves heavily, dragging slightly across the mattress.
His fingers miss the phone on the first attempt.
They brush against the charging cable, slide across the table, then finally reach the screen.
He presses the alarm off.
The sound stops abruptly.
The room becomes quiet again.
Let the silence remain for a full beat.
His hand stays resting beside the phone rather than instantly returning to bed.
He exhales slowly through his nose.
The camera makes an almost imperceptible push toward him.
No dramatic expression. No exaggerated yawn.
Only the slow recognition that the day has started.
---
## [10s–14s] — SITTING UP
He turns onto one side.
The blanket pulls across his torso and gathers naturally around his waist.
His elbow presses into the mattress.
The mattress compresses visibly beneath his weight as he pushes himself upward.
His head rises last.
His hair is slightly flattened on one side and falls unevenly across his forehead.
He moves both legs toward the edge of the bed.
One foot searches for the floor.
Then the other.
His bare toes make contact first, followed by the rest of each foot.
He remains seated at the edge of the mattress.
His back curves slightly.
His shoulders hang low.
His hands rest loosely beside his thighs.
He stares at the floor without really looking at anything.
Hold this moment.
The creased bedding behind him should remain compressed where his body had been.
The voice-over continues after a natural pause:
> “But I remember why I do this…”
---
## [14s–17s] — STANDING
He shifts his feet slightly farther apart.
His weight moves forward.
His elbows press lightly against his thighs before he pushes himself upright.
His hips rise first, followed by his shoulders.
Show realistic balance adjustment as his body settles onto both feet.
He stands still for a brief moment.
His loose neutral-coloured T-shirt falls naturally back into place. His shoulders remain slightly lowered. His breathing is calm but heavy with sleep.
The camera stays behind him at approximately waist-to-shoulder height, observing rather than presenting him.
He takes two slow steps toward the bedroom wall.
His bare feet make soft contact with the floor.
He runs his fingers along the wall for a moment before finding the light switch.
He presses it.
A warm bedside or ceiling practical light turns on.
Do not flood the entire room with brightness.
The warm light should gradually reveal wood, bedding, fabric, and skin while the cool morning light remains visible through the curtains.
His eyes narrow slightly in response.
---
## [17s–20s] — TOWARD THE BATHROOM
He turns toward the bathroom doorway and begins walking.
The camera follows several steps behind with restrained handheld drift.
His pace is slow and partially automatic.
He does not acknowledge the camera.
His arms hang naturally beside him.
His shirt moves subtly across his back with each step.
Use the bathroom doorway as a natural frame around his body.
As he crosses the threshold, briefly hold the bedroom in the background:
* the unmade bed;
* the silent phone;
* the closed laptop;
* the dark monitor;
* the hoodie over the chair;
* cool daylight still entering through the curtains.
The voice-over completes:
> “…and I get up anyway.”
The line should not swell emotionally. It should land quietly, almost as though he is reminding himself.
---
## [20s–25s] — THE BATHROOM
Follow him into a small, modern, lived-in bathroom.
Use one hidden natural transition as the camera passes behind the doorframe if necessary, but preserve the feeling of one continuous shot.
He reaches toward the bathroom light switch.
A soft neutral overhead light turns on.
The camera settles into a side angle where both his real profile and part of his reflection are visible. He never looks directly into the lens.
His face in the mirror appears tired but composed.
He reaches toward a simple toothbrush holder.
His fingers close around the toothbrush.
He turns the tap handle.
Water begins flowing into the basin with a steady, natural sound.
Small droplets strike the ceramic surface and collect around the drain.
He briefly passes the toothbrush beneath the water.
He picks up the toothpaste with his other hand.
His thumb flips open the cap.
He positions the tube above the brush and squeezes slowly.
The tube compresses naturally between his fingers.
A small line of toothpaste settles across the bristles.
He releases pressure, places the toothpaste beside the sink, and brings the toothbrush to his mouth.
He begins brushing with slow, absent-minded movements.
His free hand rests against the edge of the basin.
The water continues running softly for a moment before he reaches over and turns it off.
End with him brushing his teeth in silence while early-morning ambience fills the room.
No smile.
No inspirational pose.
No sudden burst of energy.
The morning has simply begun.
---
# CAMERA DIRECTION
* One continuous observational sequence whenever possible.
* Extreme macro lens for the opening alarm.
* Very shallow depth of field during the first six seconds.
* Slow rack focus from the alarm to the sleeping man.
* Subtle push-in while he wakes.
* Low bedside camera placement.
* Gentle handheld drift only after he stands.
* Restrained tracking movement toward the bathroom.
* Use the bedroom and bathroom doorframes as natural foreground obstruction.
* Slight parallax as the camera follows him.
* Side-angle bathroom composition with a partial mirror reflection.
* Camera movement must feel physically operated by a patient documentary filmmaker.
* No orbiting around the character.
* No floating camera.
* No passing through walls.
* No dramatic sweeps or crane movements.
* No rapid cuts.
* One concealed doorway transition is permitted for stability.
---
# CHARACTER PERFORMANCE
Use one consistent young Asian man in his mid-to-late twenties.
He should appear like a normal working software engineer rather than a fashion model.
Maintain:
* slightly messy morning hair;
* naturally tired eyes;
* realistic skin texture;
* ordinary body proportions;
* loose neutral T-shirt;
* comfortable shorts or pyjama trousers;
* bare feet;
* understated, believable posture.
His sleepiness should be communicated through timing and body weight.
He should:
* blink heavily;
* pause before each major movement;
* keep his shoulders slightly lowered;
* move his hands without perfect coordination immediately after waking;
* shift his weight realistically;
* walk quietly;
* remain unaware of the camera;
* never perform the voice-over on screen.
Do not make him appear severely exhausted, unwell, intoxicated, miserable, or emotionally distressed.
---
# ENVIRONMENTAL DETAIL
The apartment should feel modest, modern, believable, and personally inhabited.
Bedroom details may include:
* closed laptop;
* monitor in sleep mode;
* mechanical keyboard;
* notebook with a pen;
* headphones;
* charging cable;
* water bottle;
* desk chair;
* hoodie over the chair;
* soft curtains;
* plain bedding;
* digital alarm or smartphone.
These objects must remain secondary.
Avoid excessive RGB lighting, futuristic interfaces, glowing code, multiple giant monitors, hacker imagery, or stereotypical technology props.
The bathroom should include:
* small ceramic sink;
* ordinary mirror;
* toothbrush holder;
* toothpaste;
* hand towel;
* simple shelf;
* subtle tile reflections;
* minor signs of everyday use.
Avoid a spotless luxury hotel bathroom.
---
# LIGHTING AND COLOUR
* Begin with soft, cool, low-contrast dawn light.
* Use blue-grey illumination passing naturally through curtains or blinds.
* Let the alarm screen create a small local glow.
* Introduce warm practical light when he presses the bedroom switch.
* Preserve the contrast between cool exterior daylight and warm interior light.
* Use soft neutral or slightly warm bathroom lighting.
* Maintain natural skin tones.
* Use gentle cinematic contrast and realistic shadow falloff.
* Keep the overall palette muted, intimate, and grounded.
Avoid:
* neon colours;
* heavy teal-and-orange grading;
* artificial lens flares;
* dramatic rim lighting;
* fantasy glow;
* excessive darkness;
* overexposed bathroom lighting;
* motivational-commercial brightness.
---
# SOUND DESIGN
Keep the soundscape quiet, layered, and tactile.
### Bedroom ambience
* distant city traffic;
* faint room tone;
* soft electrical hum;
* subtle curtain movement;
* alarm vibration against wood;
* charging cable shifting;
* bedding sliding;
* mattress compression;
* breathing;
* bare feet touching the floor;
* quiet fabric movement;
* light-switch click;
* soft footsteps.
### Bathroom ambience
* bathroom switch;
* toothbrush lifted from the holder;
* tap handle turning;
* water striking the basin;
* toothbrush touching water;
* toothpaste cap opening;
* tube compressing;
* toothpaste settling on the bristles;
* slow brushing;
* subtle room echo.
The voice-over should sit gently above these sounds rather than overpowering them.
---
# VOICE-OVER
Use a young adult male voice.
Delivery must be:
* quiet;
* sincere;
* close-microphone;
* slightly tired;
* reflective;
* conversational;
* emotionally restrained.
Do not use trailer narration, motivational-speaker cadence, inspirational music swelling, or exaggerated pauses.
Voice-over text:
> “Most days aren’t my best days.
> But I remember why I do this…
> and I get up anyway.”
Begin the first sentence during the focus shift.
Deliver the second sentence while he sits at the edge of the bed.
Complete the final phrase as he walks into the bathroom.
---
# PHYSICAL REALISM
Every movement must show weight, resistance, and consequence.
Include:
* smartphone vibrating against wood;
* blanket tension as he moves;
* pillow compression;
* mattress deformation beneath his elbow and hips;
* feet searching for the floor;
* realistic centre-of-gravity changes while standing;
* natural cloth movement;
* proper hand contact with the switch;
* believable walking rhythm;
* accurate grip on the toothbrush and toothpaste;
* realistic water flow;
* toothpaste tube deformation;
* correct mirror behaviour;
* natural brushing motion.
Objects must not move unless physically touched or affected by the environment.
---
# CONTINUITY REQUIREMENTS
Maintain exactly the same:
* face;
* hairstyle;
* clothing;
* body proportions;
* skin tone;
* bedroom arrangement;
* bathroom arrangement;
* phone;
* bedding;
* toothbrush;
* toothpaste;
* lighting direction;
* time of morning.
The bathroom must feel directly connected to the bedroom.
The character must not change appearance between spaces.
The mirror reflection must match his real movement precisely.
---
# NEGATIVE CONSTRAINTS
* No direct eye contact with the camera.
* No on-screen dialogue.
* No lip-syncing to the voice-over.
* No influencer presentation.
* No vlog gestures.
* No smiling at the audience.
* No fast montage.
* No opening the laptop.
* No typing or coding.
* No breakfast sequence.
* No shower.
* No getting dressed.
* No leaving the apartment.
* No dramatic stretching.
* No exaggerated yawning.
* No energetic wake-up.
* No instant movement from bed to bathroom.
* No teleportation.
* No unrelated extra scenes.
* No rapid edits.
* No impossible camera paths.
* No random camera shake.
* No warped mirror reflection.
* No changing facial features.
* No changing clothes.
* No malformed hands.
* No extra fingers.
* No floating objects.
* No disappearing props.
* No changing room layout.
* No excessive slow motion.
* No text overlays.
* No captions.
* No logos.
* No watermark.
* No artificial motivational-commercial tone.
Visuelles FormatKI-Video
Visueller StilPhotography
FERTIGES VIDEO
Verwandle deine Fotos in 3 einfachen Schritten in beeindruckende Videos
1 Fotos hochladen und Text hinzufügen
Lade zuerst deine Bildersammlung über den Button „Deine Fotos hochladen“ hoch. Optional kannst du eine Beschreibung zu deinen Fotos angeben (z. B. „Familienurlaubsfotos vom Sommer 2024“). Aus diesem Text lässt sich ein Voiceover generieren, das deiner Video-Story eine persönliche Note verleiht.
2 Stimme, Optik und Effekte anpassen
Wähle eine KI-Stimme aus unserer Bibliothek oder lade deine eigene hoch. Lege die Zieldauer deines Videos, das Bildformat (Querformat, Hochformat oder Quadrat) und die Hintergrundmusik fest. Entdecke die erweiterten Optionen: Aktiviere „Stiltransfer anwenden“, um deine Fotos mit künstlerischen Stilen wie Ghibli, Anime oder Skizze zu verwandeln (kostet 16 Credits pro Bild), oder aktiviere „Bilder in KI-Videos umwandeln“, um deine statischen Bilder zu animieren und dynamischere Inhalte zu erhalten. Wähle ein Videogenerierungsmodell (Base, Pro oder Ultra), das zu deinen Qualitätsansprüchen passt.
3 Video generieren und anpassen
Klicke auf den Button „Video generieren“. Unsere KI kombiniert deine Fotos, die gewählten Effekte, das Voiceover und die Musik intelligent zu einem fesselnden Video mit sanften Übergängen. Nach der Generierung kannst du im integrierten Editor von Revid AI letzte Anpassungen vornehmen, das Video kürzen oder Texteinblendungen hinzufügen, bevor du dein einzigartiges Foto-Video herunterlädst und teilst.
01
Verwandle deine Fotosammlung in ein Video mit fließenden Übergängen und Musik
Lade deine Fotos hoch und Revid generiert automatisch ein komplettes Video mit fließenden Übergängen, synchronisierter Musik und filmischem Tempo. Du musst weder eine Timeline bearbeiten noch Übergänge einstellen oder Musik auswählen. Die KI ordnet deine Fotos zu einer fließenden visuellen Geschichte an, setzt Übergänge passend zur Stimmung der Bilder ein und ergänzt einen Musiktitel, der zu Tempo und Gefühl der Sammlung passt. Vom Upload bis zum fertigen Video vergehen nur wenige Minuten. So wird jedes Fotoset noch am Tag der Aufnahme zu einem Video, das du teilen kannst.
02
Was der KI-Foto-zu-Video-Konverter aus deinen Bildern macht
Der Foto-zu-Video-Konverter analysiert die hochgeladenen Bilder, ordnet sie anhand von Bildkomposition und Inhalt in einer natürlich wirkenden Reihenfolge an und erstellt ein fertiges Video mit fließenden Übergängen und synchronisierter Musik. Du kannst das Thema oder den Anlass der Fotos beschreiben, um die Bearbeitung der KI zu steuern, oder die beste Anordnung automatisch bestimmen lassen. Das Ergebnis ist ein komplettes Video mit professioneller Präsentation im teilbaren Format. Nach dem Upload musst du dafür keine weiteren Schnittentscheidungen treffen.
03
Fotovideos, die deine Erinnerungen auf jeder Social-Media-Plattform teilen
Foto-Slideshows funktionieren auf TikTok, Instagram und YouTube Shorts als Video deutlich besser als als statische Bildergalerien. Dieselben Fotos, die als Karussell-Beitrag nur wenig Interaktion bekommen, können tausende Zuschauer erreichen, wenn sie in ein flüssiges Video mit Musik und Übergängen verwandelt werden. Events, Reisen, Hochzeiten und persönliche Meilensteine profitieren von der größeren Reichweite und der emotionalen Wirkung des Videoformats. Mit Revid wird aus jedem Fotoset ein Social-Media-taugliches Video, und zwar in der Zeit zwischen dem Fotografieren und dem Moment, in dem du es teilen willst.
Zielgruppe
Für wen ist dieses Tool?
Privatpersonen, die persönliche Fotos als Videos teilen
Verwandle Urlaubsfotos, Geburtstagssammlungen und Familienerinnerungen in flüssige Videos mit Musik, die sich ganz ohne Bearbeitungsaufwand wunderbar in sozialen Netzwerken teilen lassen.
Hochzeitsfotografen, die Highlight-Videos liefern
Erstelle schnelle Foto-zu-Video-Highlights für Kunden ohne aufwendigen Videoschnitt und liefere zu jedem Shooting eine ansprechende visuelle Zusammenfassung zusätzlich zur Fotogalerie.
Immobilienmakler, die Präsentationsvideos für Objekte erstellen
Verwandle Fotosets von Immobilien in flüssige Präsentationsvideos für Exposés, Social Media und Kundenpräsentationen, ohne dass ein Videoeditor jedes Objekt einzeln bearbeiten muss.
Eventfotografen, die Galerien in teilbare Videos verwandeln
Erstelle aus deinen Fotos teilbare Event-Highlight-Videos, die in sozialen Netzwerken ein größeres Publikum erreichen als statische Galerie-Links oder einzelne Foto-Beiträge.
Vergleich
Revid vs. manuelles Erstellen von Foto-Slideshow-Videos
Ein Foto-Slideshow-Video von Hand zu bauen bedeutet: Bilder importieren, Timeline anordnen, Übergänge hinzufügen, Musik synchronisieren und exportieren. Revid generiert aus deinen hochgeladenen Fotos automatisch das komplette Video.
Eingabe
Revid Foto-zu-Video-KonverterFotos hochladen und sofort ein Video generieren
Andere ToolsFotos in die Schnittsoftware importieren und die Timeline manuell anordnen
Reihenfolge
Revid Foto-zu-Video-KonverterKI ordnet die Fotos automatisch zu einer fließenden Geschichte an
Andere ToolsPosition und Reihenfolge jedes Fotos werden manuell festgelegt
Übergänge
Revid Foto-zu-Video-KonverterFließende Übergänge werden automatisch eingesetzt und getimt
Andere ToolsÜbergang und Timing müssen für jedes Foto manuell ausgewählt werden
Musik
Revid Foto-zu-Video-KonverterMusik wird automatisch ausgewählt und auf das Tempo der Bilder abgestimmt
Andere ToolsMusik muss gesucht, lizenziert und manuell synchronisiert werden
Produktionszeit
Revid Foto-zu-Video-KonverterFertiges Fotovideo wenige Minuten nach dem Hochladen
Andere ToolsStunden an Schnittarbeit pro fertigem Slideshow-Video
Erforderliche Kenntnisse
Revid Foto-zu-Video-KonverterKeine Videoschnitt-Kenntnisse und keine Software nötig
Andere ToolsErfordert Erfahrung mit Videoschnitt-Tools und Timeline-Workflows
Funktion / Vorteil
Revid Foto-zu-Video-Konverter
Andere Tools
Eingabe
Fotos hochladen und sofort ein Video generieren
Fotos in die Schnittsoftware importieren und die Timeline manuell anordnen
Reihenfolge
KI ordnet die Fotos automatisch zu einer fließenden Geschichte an
Position und Reihenfolge jedes Fotos werden manuell festgelegt
Übergänge
Fließende Übergänge werden automatisch eingesetzt und getimt
Übergang und Timing müssen für jedes Foto manuell ausgewählt werden
Musik
Musik wird automatisch ausgewählt und auf das Tempo der Bilder abgestimmt
Musik muss gesucht, lizenziert und manuell synchronisiert werden
Produktionszeit
Fertiges Fotovideo wenige Minuten nach dem Hochladen
Stunden an Schnittarbeit pro fertigem Slideshow-Video
Erforderliche Kenntnisse
Keine Videoschnitt-Kenntnisse und keine Software nötig
Erfordert Erfahrung mit Videoschnitt-Tools und Timeline-Workflows
Weitere Tools
Entdecke ähnliche KI-Video-Tools für Videobearbeitung
Entdecke weitere Möglichkeiten, mit unseren KI-Tools ansprechende Videos zu erstellen
FAQs
Häufig gestellte Fragen
Was ist der KI-Foto-zu-Video-Konverter?
Der Foto-zu-Video-Konverter von Revid AI ist ein leistungsstarkes Tool, das mithilfe von künstlicher Intelligenz deine statischen Fotosammlungen in ansprechende Videos verwandelt. Lade einfach deine Bilder hoch, füge optional eine Beschreibung oder ein Skript hinzu und wähle Anpassungsoptionen wie Musik, Übergänge und KI-gestützte Effekte. Unser Tool erstellt dir in wenigen Minuten ein professionell wirkendes Video. Perfekt für Diashows, Social-Media-Inhalte oder um Erinnerungen festzuhalten.
Wie erstelle ich mit diesem Tool ein Video aus meinen Fotos?
Ganz einfach! Lade zuerst deine gewünschten Fotos hoch. Gib danach optional eine Textbeschreibung oder ein Skript für ein Voiceover ein. Passe dann dein Video an: Wähle eine KI-Stimme (oder lade deine eigene hoch), eine Zieldauer, ein Seitenverhältnis (9:16, 16:9 oder 1:1) und Hintergrundmusik. Du kannst außerdem „Stiltransfer anwenden“ aktivieren, um deinen Fotos einen künstlerischen Look zu geben. Zum Schluss klickst du auf „Video generieren“ und unsere KI erstellt dein Video.
Welche Fotos kann ich mit dem Foto-zu-Video-Konverter verwenden?
Du kannst viele verschiedene Bildformate verwenden (JPG, PNG usw.). Ob Familienurlaubsfotos, Produktbilder, Eventfotos oder jede andere Bildersammlung, die du zum Leben erwecken möchtest: Unser KI-Foto-Video-Generator kommt damit zurecht. Für die besten Ergebnisse nutze klare Bilder in guter Qualität.
Kann ich meinem Foto-Video ein Voiceover hinzufügen?
Auf jeden Fall! Du kannst eine Beschreibung für deine Fotos oder ein komplettes Skript eingeben, das unsere KI mit einer unserer realistischen KI-Stimmen in ein Voiceover umwandelt. Du kannst auch eine eigene, bereits aufgenommene Audiodatei als Voiceover hochladen und deinem Video so eine persönliche Note geben.
Was bedeuten die Optionen „Stiltransfer anwenden“ und „Bilder in KI-Videos umwandeln“?
„Stiltransfer anwenden“ verwandelt deine hochgeladenen Fotos mit künstlerischen Stilen wie Ghibli, Anime, Skizze, Pixar und mehr (diese Funktion kostet 16 Credits pro Bild). Dieses Tool enthält keine Option „Bilder in KI-Videos umwandeln“. Der Stiltransfer ist daher die verfügbare Erweiterung, und du entscheidest selbst, ob du ihn nutzen möchtest.
Wie wirkt sich die Einstellung „Zieldauer“ auf mein Video aus?
Mit der Einstellung „Zieldauer“ legst du die ungefähre Länge deines fertigen Videos fest (von 10 bis 600 Sekunden). Unsere KI versucht dann, die Anzeige der Fotos, die Übergänge und das Voiceover so zu takten, dass sie in etwa in diese Dauer passen. So erstellst du Inhalte, die zu verschiedenen Plattformen und Aufmerksamkeitsspannen passen.
Welche Seitenverhältnisse sind für mein Foto-Video verfügbar?
Unser Foto-zu-Video-Konverter bietet Hochformat (9:16), ideal für TikTok und Instagram Reels, Querformat (16:9), perfekt für YouTube und Websites, Quadrat (1:1) sowie 4:5, bestens geeignet für Instagram-Posts und andere Social-Media-Feeds. Unsere KI passt deine Fotos an das gewählte Seitenverhältnis an.
Wie kann ich Musik zu meinem Video aus Fotos hinzufügen?
Du kannst deinem Foto-Video ganz einfach Musik hinzufügen. Wir bieten dir eine Bibliothek mit Hintergrundtracks zur Auswahl. Alternativ kannst du eine eigene Audiodatei als Soundtrack für deine Video-Diashow hochladen. Achte darauf, dass du die Rechte an der hochgeladenen Musik besitzt.
Welche Optionen gibt es beim „Videogenerierungsmodell“ (Base, Pro, Ultra)?
Die Optionen beim „Videogenerierungsmodell“ (Base, Pro, Ultra) stehen für unterschiedliche Stufen der KI-Verarbeitung und Qualität, wenn die Funktion „Bilder in KI-Videos umwandeln“ aktiviert ist. „Base“ liefert Animationen in guter Qualität, während „Pro“ und „Ultra“ zunehmend ausgefeiltere und detailreichere Videogenerierung aus deinen Bildern bieten, was den Credit-Verbrauch beeinflussen kann. Wähle das Modell, das am besten zu deinen Qualitätsansprüchen und deinem Budget passt.
Was kostet die Nutzung des Foto-zu-Video-Konverters?
Die Credit-Kosten für ein Video hängen von mehreren Faktoren ab, unter anderem von der Anzahl der Fotos und davon, ob du Premium-Funktionen aktivierst. Die einfache Videoerstellung hat einen Grundpreis in Credits. Die Aktivierung von „Stiltransfer anwenden“ kostet zusätzlich 16 Credits pro Bild. Die Funktion „Bilder in KI-Videos umwandeln“ und die Wahl der Videogenerierungsmodelle „Pro“ oder „Ultra“ können den Credit-Verbrauch ebenfalls erhöhen. Vor der Generierung deines Videos siehst du die geschätzten Credit-Kosten. Credits erhältst du über unsere Abo-Pläne oder im Rahmen einer kostenlosen Testphase.
Wie lange dauert es, meine Fotos in ein Video umzuwandeln?
Die Generierung dauert in der Regel wenige Minuten bis etwas länger, je nach Anzahl der Fotos, den gewählten Funktionen (wie Stiltransfer oder KI-Videogenerierung aus Bildern) und der festgelegten Zieldauer. Unsere KI arbeitet effizient daran, aus deinen Bildern ein Video zu machen, und du wirst benachrichtigt, sobald es fertig ist.
Kann ich das Video nach der Generierung aus meinen Fotos noch bearbeiten?
Ja! Sobald unser KI-Foto-zu-Video-Konverter dein Video erstellt hat, kannst du den intuitiven integrierten Video-Editor von Revid AI nutzen. Du kannst Übergänge anpassen, Zeiten ändern, Texteinblendungen hinzufügen, den Ton optimieren und weitere Verbesserungen vornehmen, um dein Video zu perfektionieren, bevor du es herunterlädst oder teilst.
Wo kann ich die Videos aus meiner Fotosammlung teilen?
Die von dir erstellten Videos eignen sich perfekt zum Teilen auf allen großen Social-Media-Plattformen wie TikTok, Instagram (Reels, Stories, Posts), YouTube (Shorts, lange Videos), Facebook und mehr. Du kannst sie auch auf Websites einbetten oder direkt mit Freunden und Familie teilen. Mit der Wahl des Seitenverhältnisses optimierst du dein Video für deine bevorzugte Plattform.
Ich habe weitere Fragen dazu, wie ich meine Bilder in ein Video verwandle. Wie bekomme ich Hilfe?
Wir helfen dir gern! Wenn du weitere Fragen zur Nutzung des KI-Foto-zu-Video-Konverters oder eines anderen Revid AI Tools hast, wende dich per E-Mail an unser Support-Team unter hello@revid.ai. Wir unterstützen dich dabei, aus deinen Bildern großartige Videos zu erstellen.
Vom Signal zum veröffentlichten Video in vier Schritten.
1
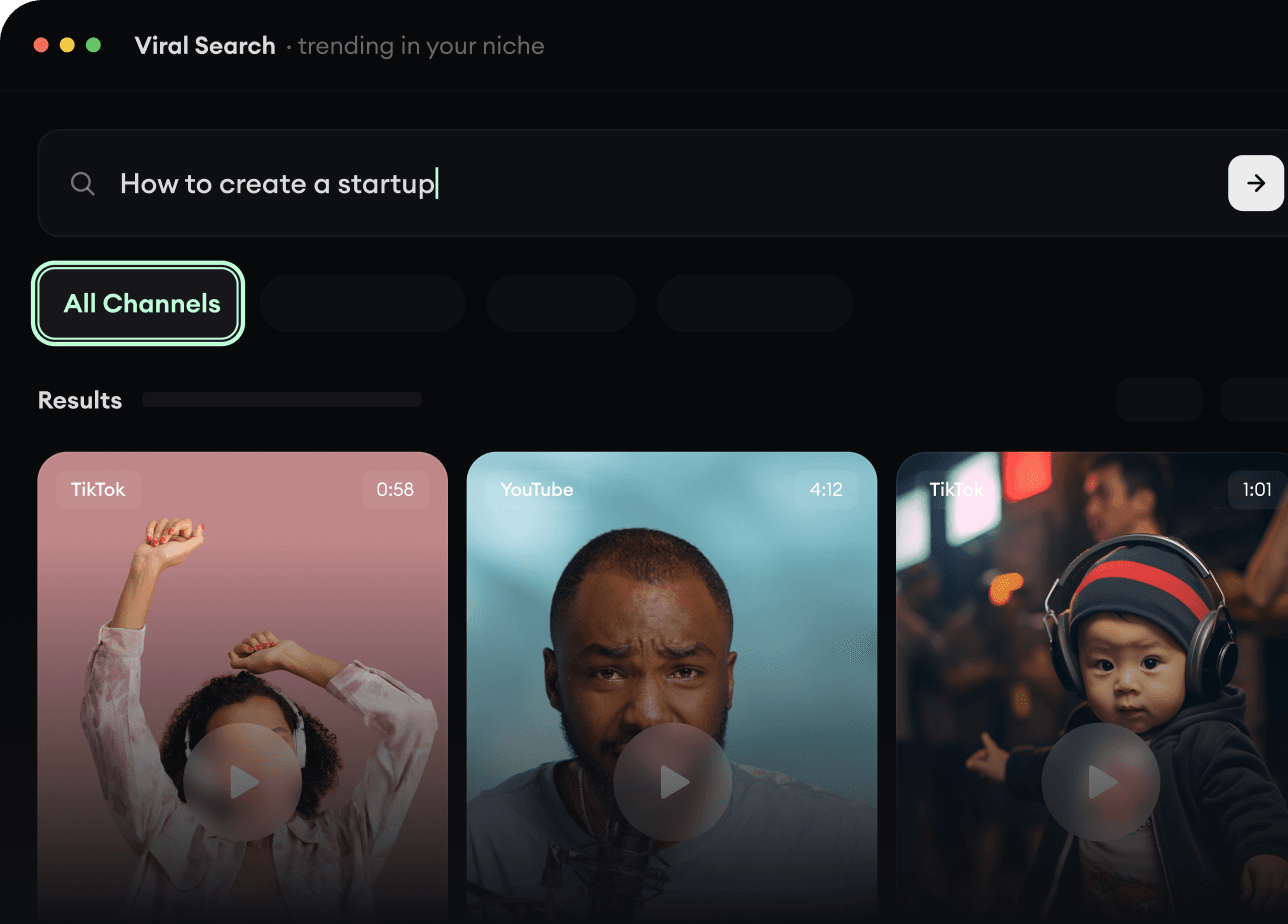
Finde virale Videos und Trends.
Revids Viral Search und Channel Watcher zeigen dir die Formate, Creator und Trends, die gerade Aufmerksamkeit bekommen, und helfen dir, eigene Ideen daraus zu machen.
Entdecke erfolgreiche Videoformate in deiner Nische
Folge den Creatorn und Kanälen, die zählen
Starte mit bewährten Ideen, statt zu raten
2
Mach aus einer Idee eine Story.
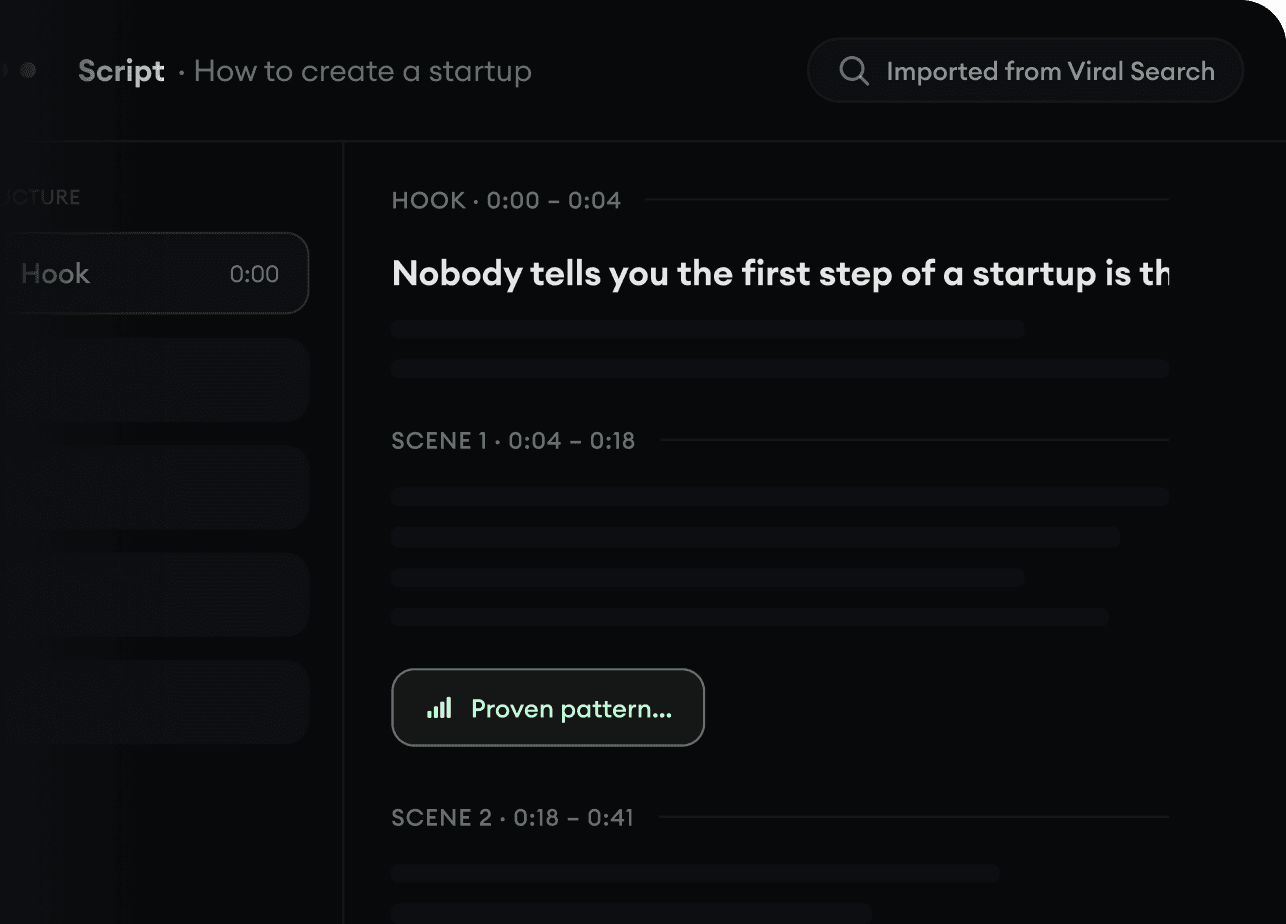
Etwas Spannendes gefunden? Revid AI schreibt das Skript, schlägt die Struktur vor und macht aus Links, Prompts oder Themen komplette Videokonzepte.
Starte mit einem Prompt, Thema oder einer URL
Generiere Skripte nach bewährten Mustern
Baue Stories, die Zuschauer fesseln
3
Erstelle das fertige Video.
Skript, KI-Stimme, Bilder, Untertitel und Schnitt entstehen in einem Workflow. Kein Jonglieren mit fünf verschiedenen Tools.
Verwandle Text in komplette, mehrminütige Videos
Generiere alles an einem Ort
Verfeinere das Ergebnis im Editor
4
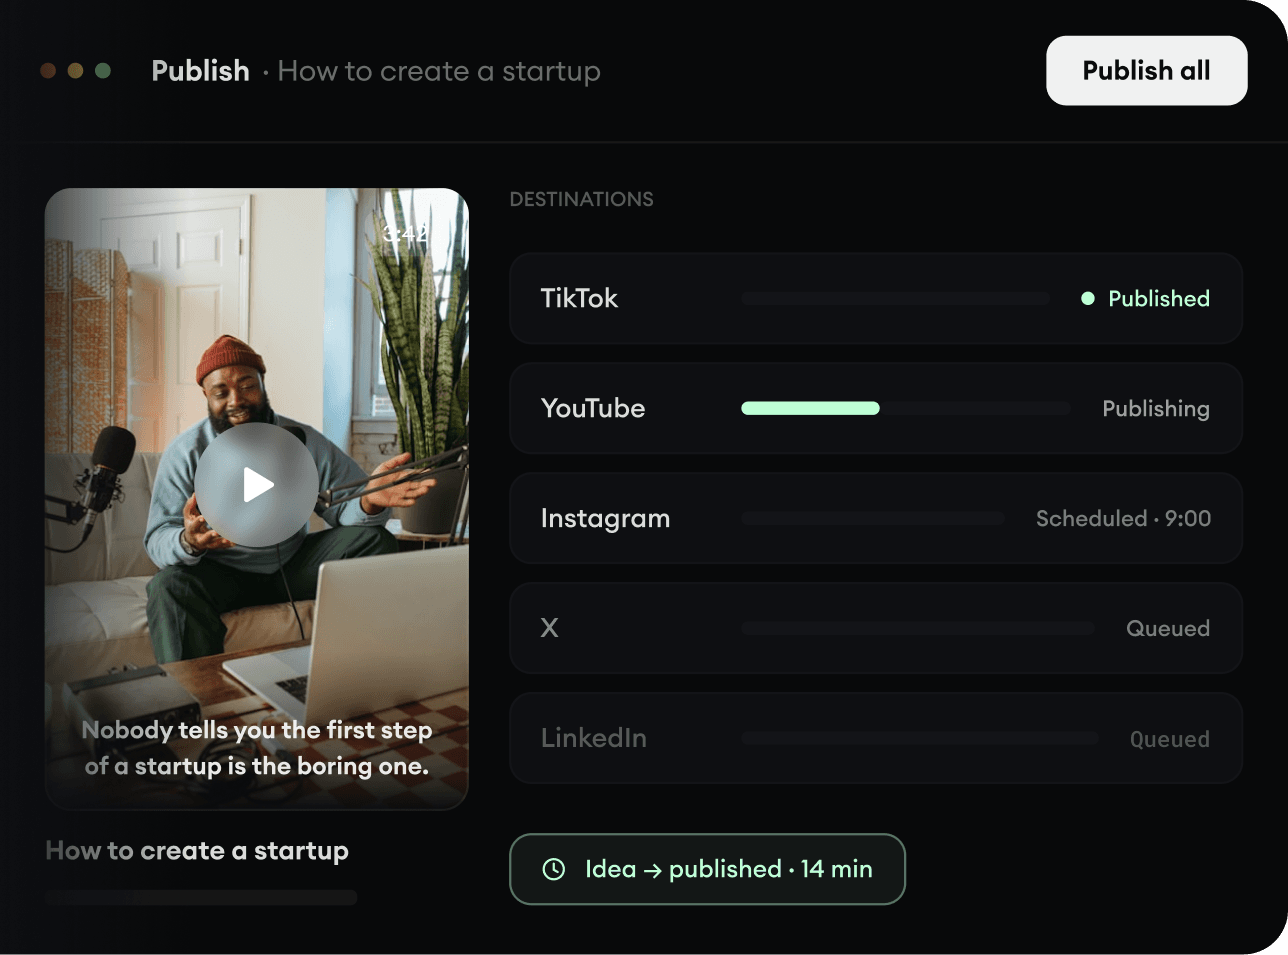
Veröffentliche überall.
Teile deine Videos auf TikTok, YouTube, Instagram und überall dort, wo dein Publikum ist.
Veröffentliche auf allen großen Plattformen
Erreiche mehr Menschen mit weniger Aufwand
Von der Idee zum veröffentlichten Video in Minuten